How to put an animated 3D model on your flyers and packaging, with parts people can tap
Turn a product into a 3D model that stands on your printed page, moves, and explains itself part by part when people tap it. From the 3D file to the finished scan, with real screens.
Tutorial11 min read
Key takeaways
- People scan a QR code on the print and the 3D model stands on the page in their phone browser. No app.
- Give the model separate, named parts. A model exported as one merged piece has nothing to tap.
- Animate in Blender or any 3D tool and keep the animation in the GLB, or let Meishi move the parts for you: lift, spin, bounce or pop out. Robots get a keyframe timeline.
- Each object plays by itself, once on tap, or loops from a tap.
- Tap actions give every part its own move and an info card with a title, text, photo and button. Hotspots pin numbered cards anywhere on the model.
- Tap actions, hotspots and play modes can be changed after printing, for free.
In this article
What you will make
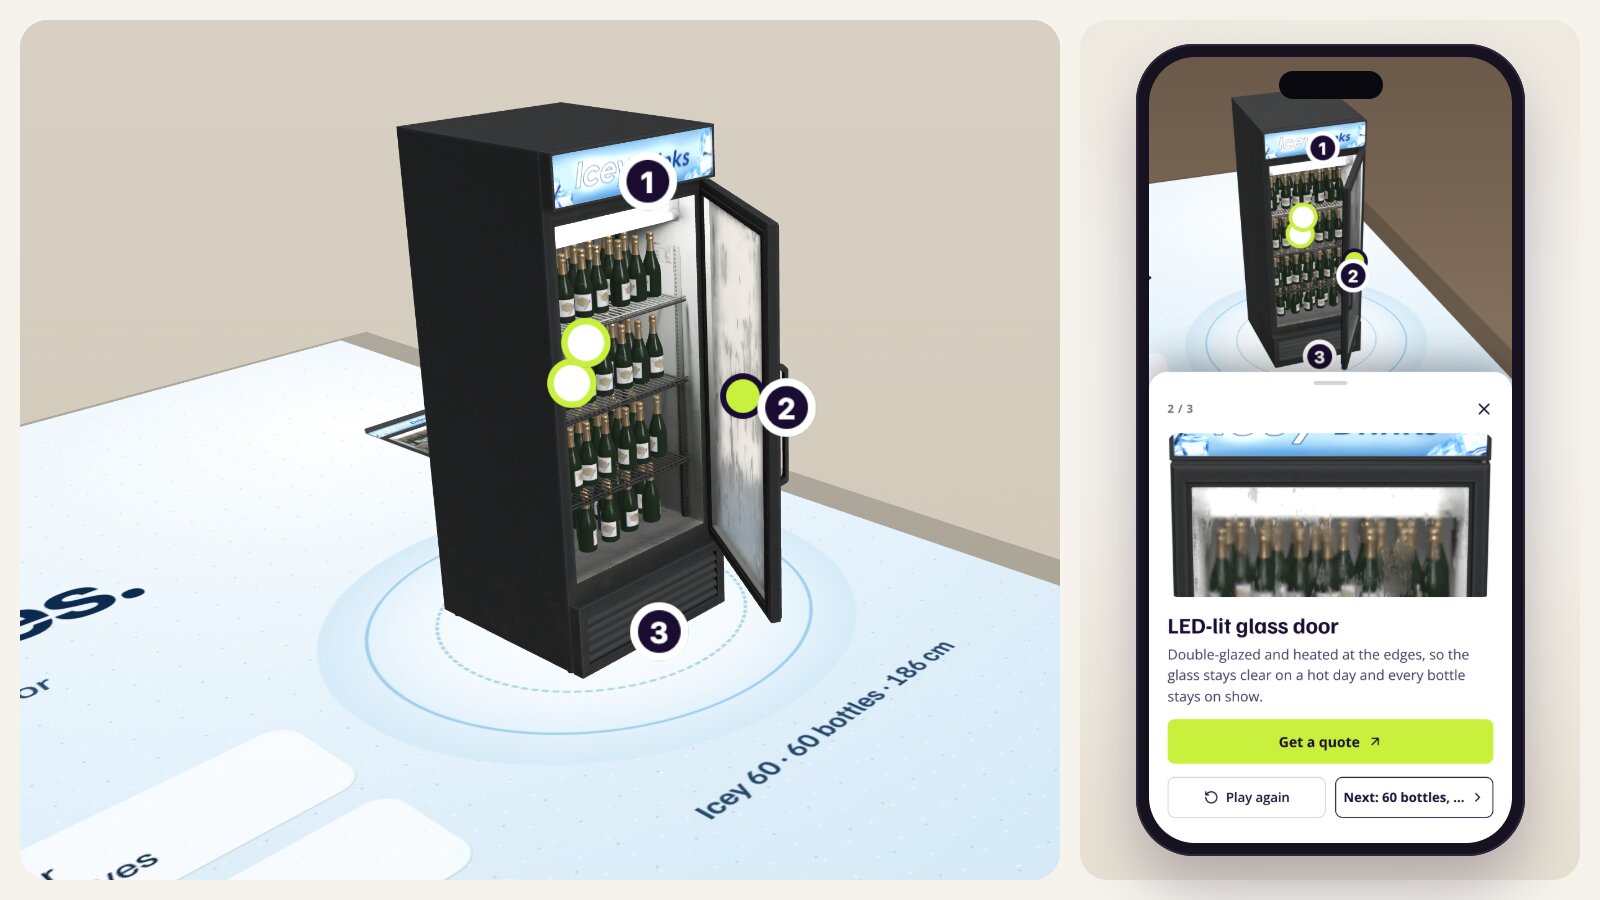
A printed page that turns into a small product demo. Someone scans the QR code, points the phone at the paper, and your product stands on it in 3D. It moves. Tap the door and it opens. Tap the shelves and they slide out. Glowing dots show what can be tapped, and each tap opens a short card with a photo, a few lines of text and a button such as "Get a quote".
Our example in this guide is a sell sheet for a glass-door drinks cooler, a made-up "Icey 60". The same steps work for anything with parts worth explaining: a machine on a trade show flyer, a gadget on its box, a piece of furniture in a catalogue, a robot on a brochure.
Step 1: Get a 3D model with separate parts
There are four usual ways to get a model:
- From your own design files. If the product was designed in CAD, the 3D data already exists. Export it as glTF or GLB if your tool offers it, or export each part as STL or OBJ.
- From a 3D artist or Blender. A freelancer can model a product from photos and measurements, often in a few days.
- From your online shop. Many shops already have GLB files for their 3D and AR product viewers.
- From a model library. Sites such as Sketchfab, Poly Haven or the Khronos glTF samples have models under open licences. Check the licence, and credit the author if it asks for it. The cooler in this guide comes from the Khronos samples, under CC BY 4.0.
Meishi takes GLB and glTF files, animations and textures included, up to 50 MB. It also builds a model in your browser from a robot description (a URDF with its STL, DAE or OBJ parts, as a .zip or a folder) or from several loose STL, OBJ or DAE files at once, one part per file.
Why parts matter
Meishi treats each branch of the model as a part. If the whole product was exported as one merged mesh, there is only one thing to tap. So before you export:
- Keep every piece that moves or deserves a card as its own object: a door, a lid, a drawer, a wheel, a button.
- Group what belongs together. The door frame, the glass and the handle go under one "Door" parent, so they move and answer taps as one.
- Name the parts. Names show up in the editor and become the first title of each card. "Door" is better than "Cube.014".
- Put each pivot where the part turns. A door turns around its hinge, so its origin belongs on the hinge.
- Keep it light. Phones download the model over mobile data. Remove what nobody sees, keep textures at 2048 pixels or less, and a few megabytes will load in seconds.
Step 2: Animate it
You can bring an animation with the model, let Meishi move the parts for you, or both.
In Blender or another 3D tool
Blender, Maya, Cinema 4D and 3ds Max all export glTF animations. In Blender:
- Set a keyframe on the part at the start, move to a later frame, change the part and set another keyframe. For our cooler: the door's rotation at frame 0, then 100 degrees open at frame 30.
- Keep the whole move in one animation (one action in Blender). If a model has several animations for the same parts, such as Idle, Walk and Run, only the first one plays.
- Choose File > Export > glTF 2.0, pick glTF Binary (.glb) and leave Animation switched on.
For characters, Adobe's free Mixamo rigs a human figure and adds ready-made moves. Download the result as FBX, open it in Blender and export a GLB.
Keep animations short. One to three seconds is plenty for something that plays on a tap.
In Meishi, without a 3D tool
Two kinds of movement need no animation in the file at all:
- Part motions. Any part can Lift, Spin, Bounce or Pop out when it is tapped. More on that in step 5.
- Robots. A robot imported from a URDF gets Animate robot, a keyframe timeline right in the editor.
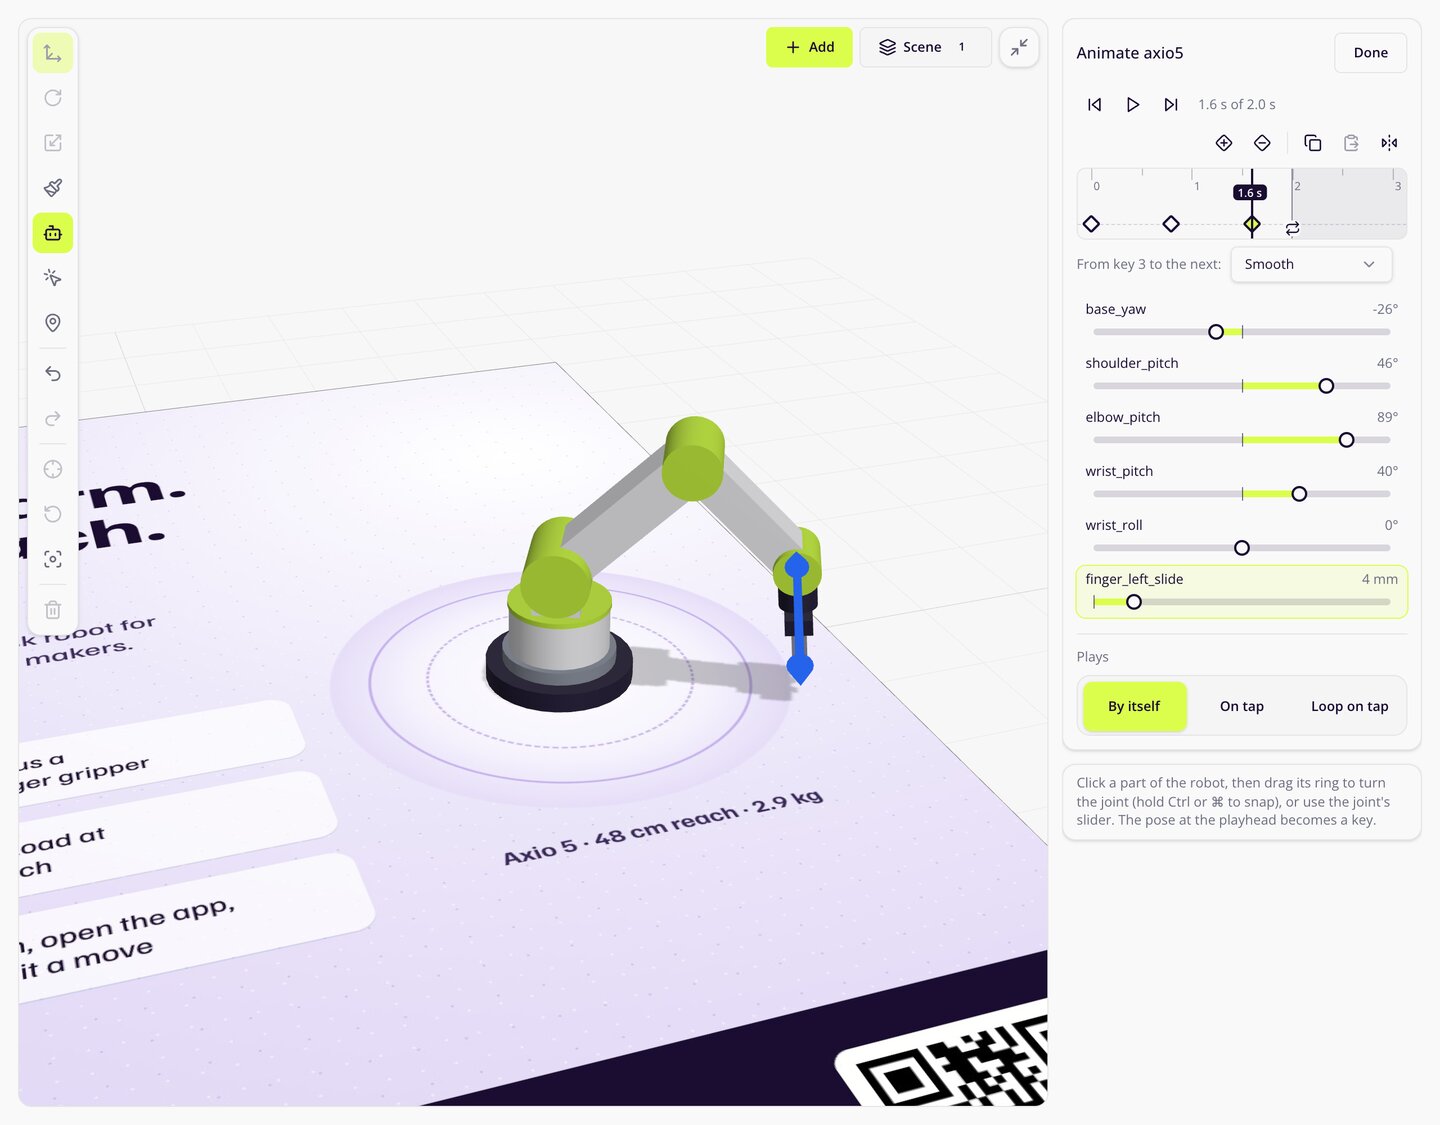
Click a part of the robot and drag its ring to turn the joint (hold Ctrl or ⌘ to snap), or use the joint's slider. Whatever pose the robot has at the playhead becomes a key, and the robot moves from key to key. Pick how it moves between two keys: Smooth, Ease in and out, Linear or Hold. Space plays the loop, I adds a key, and Mirror pose swaps left and right for robots with pairs of legs or arms. Drag the end of the loop to make it longer or shorter.
Step 3: Stand the model on your print
In Meishi, open AR Experiences and click Create experience:
- Print. Design the page in Meishi or upload your own artwork.
- QR code. Place the code where people will see it.
- What appears. Choose 3D objects.
- Content and placement. Click Add, then Add model, and pick your file. Arrange it with Move, Rotate and Scale, then click Save arrangement.
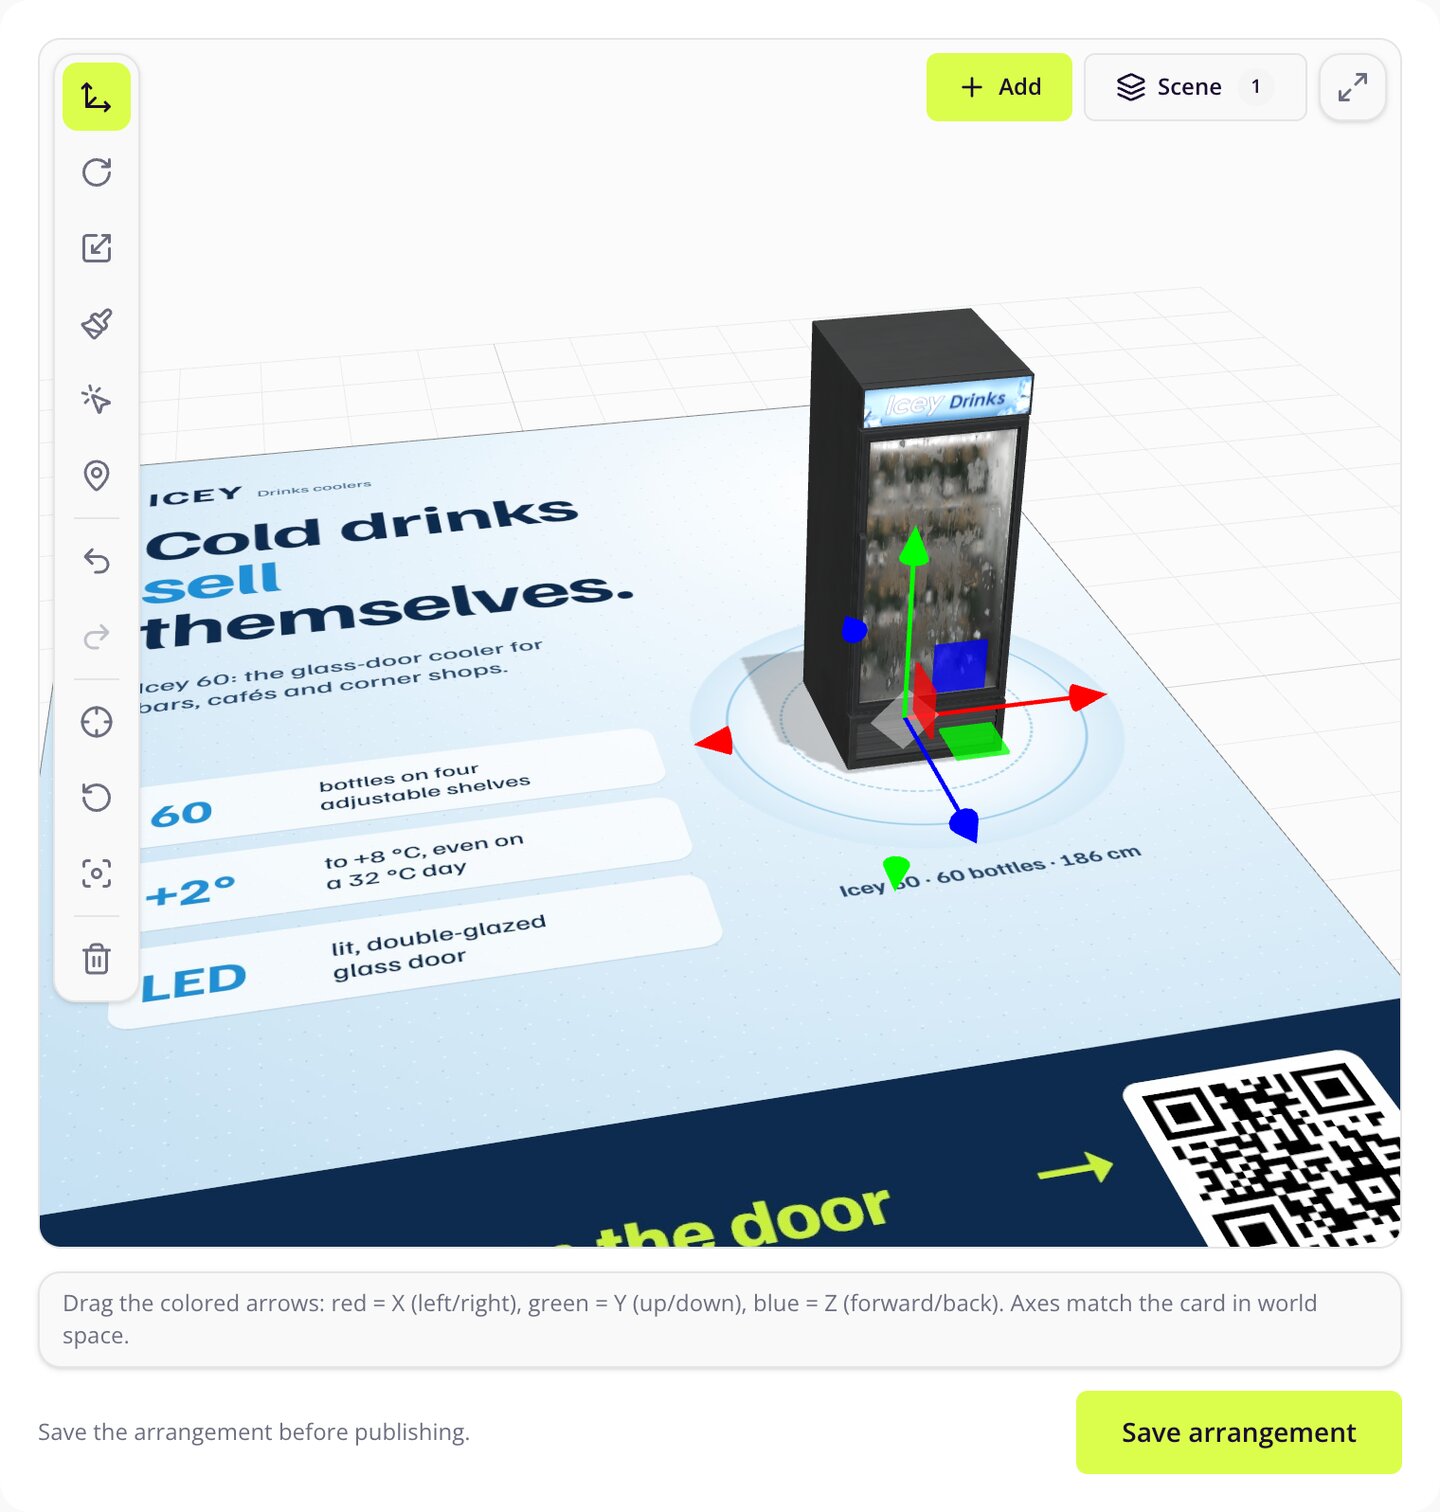
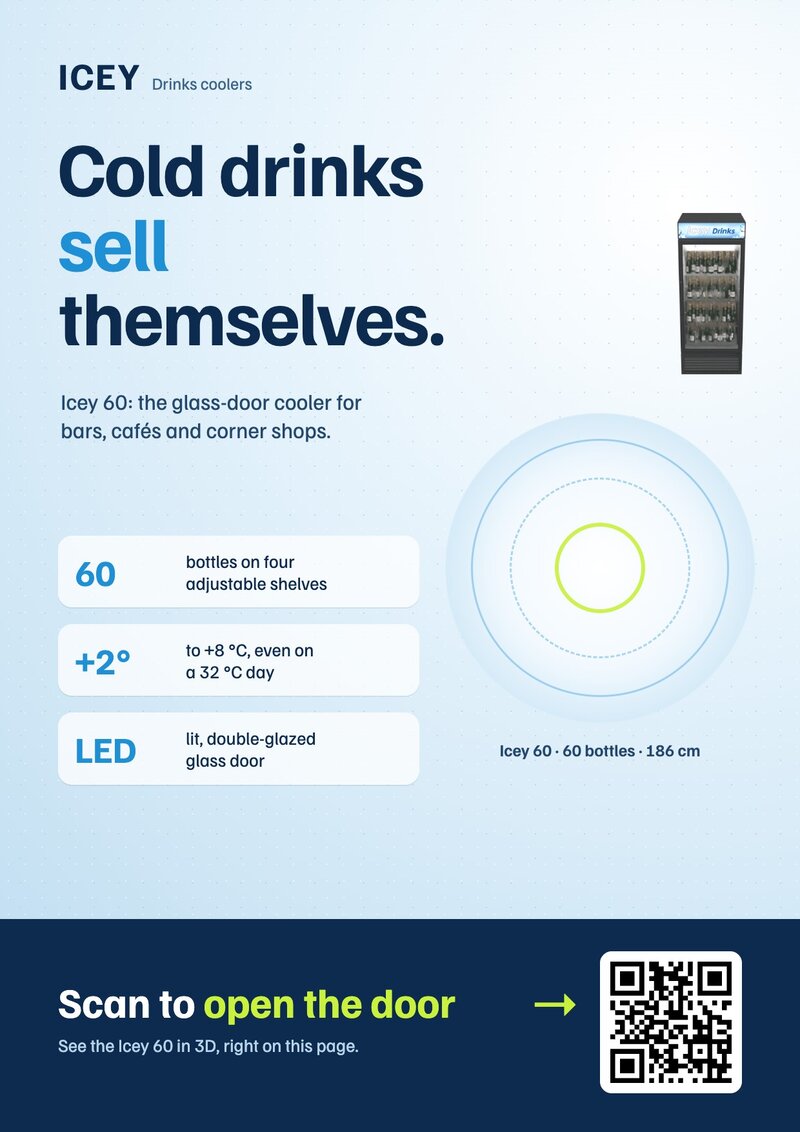
For business cards it is the same editor: in the card's Add hologram step, choose 3D scene. On a card that already exists, click Edit hologram.
Step 4: Choose how it plays
Click Scene at the top of the editor, then the arrow next to your model (Play settings):
- By itself. The animation loops as soon as the print is found.
- On tap. It waits, and plays once each time someone taps it.
- Loop on tap. The first tap starts the loop, the next one stops it.
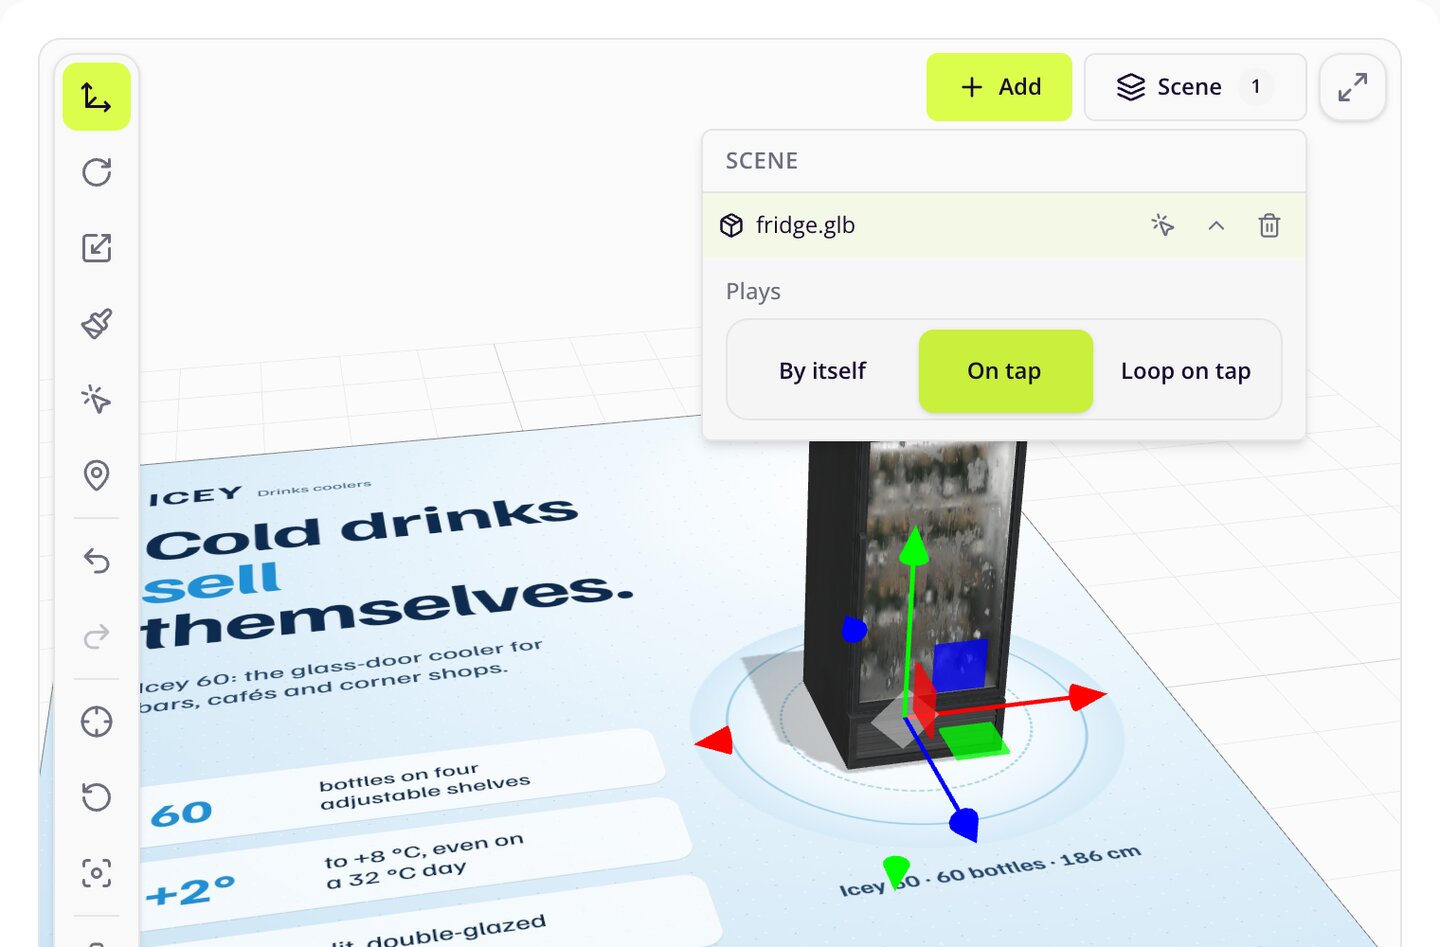
When an animation moves several parts and plays on a tap, one more choice appears, A tap plays: The whole model, or Just the tapped part, so each part plays its own piece of the animation.
Step 5: Make each part tappable, with a description
Click Tap actions in the toolbar (the pointer with sparks). Then click a part on the model, or pick it from the Parts list. The part you are editing turns lime.
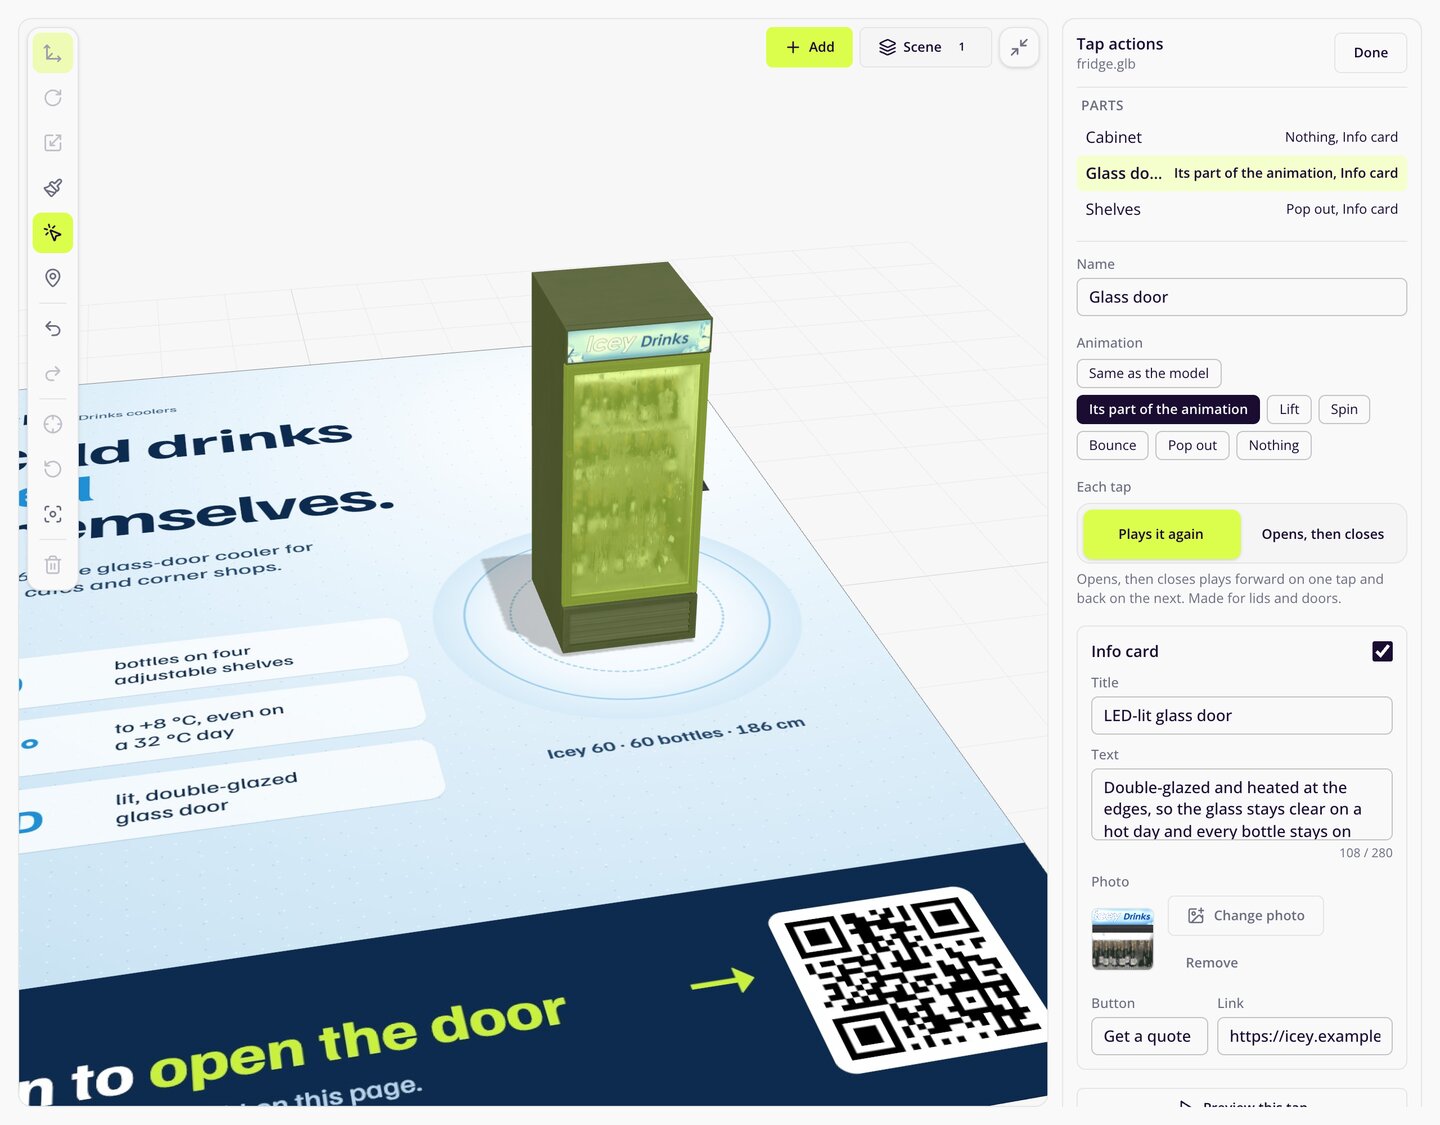
For each part you set:
- Name. What the part is called in the list and on its card.
- Animation. Same as the model plays the model's animation. Its part of the animation plays only what moves this part. Lift, Spin, Bounce and Pop out are Meishi's own moves and work on any model, even one without animation. Nothing keeps the part still.
- Each tap. Plays it again repeats the move on every tap. Opens, then closes plays it forward on one tap and back on the next, made for lids, drawers and doors.
- Info card. A Title (up to 64 characters), a Text (up to 280), a Photo (JPEG, PNG or WebP) and a Button with its Link, such as "Get a quote" or "Book a demo". Links must start with https://.
Click Preview this tap to see the move in the editor. Here is how we set up the cooler:
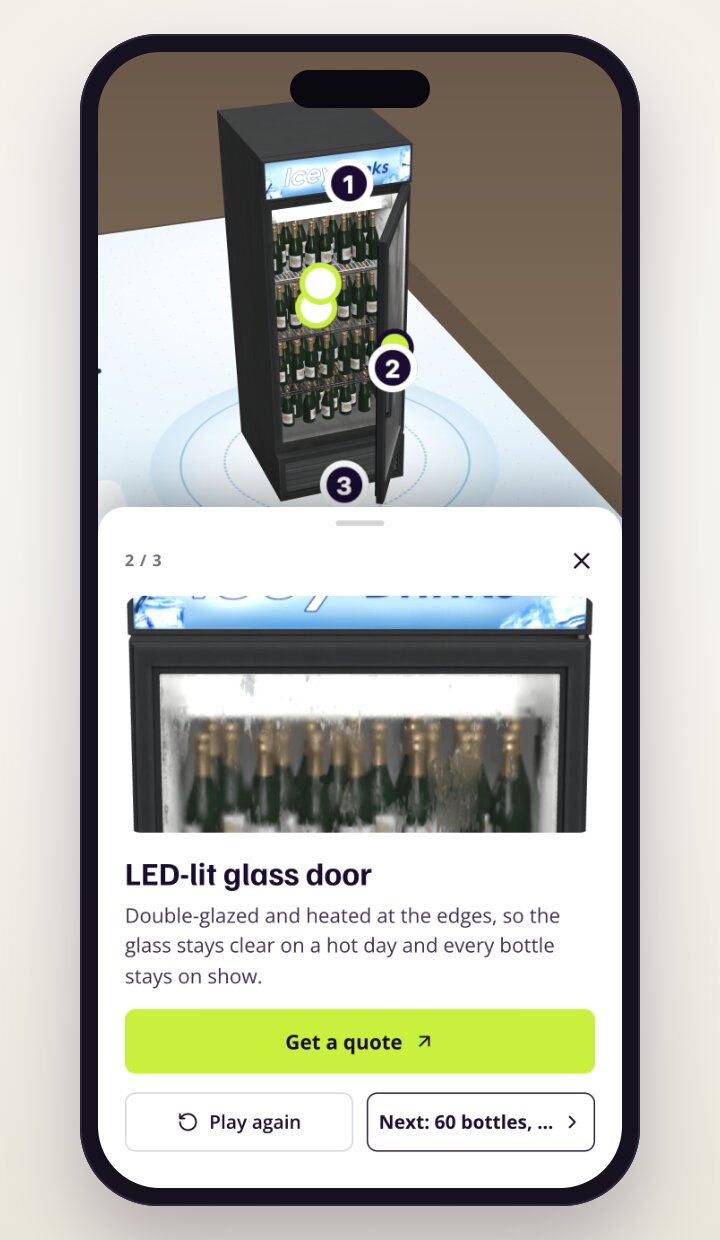
- Glass door: its part of the animation, with a card about the double-glazed door, a photo and a "Get a quote" button.
- Shelves: Pop out with Opens, then closes, so the shelves slide out on one tap and back on the next, with a card about the 60 bottles they hold.
- Cabinet: no move, just a card about the quiet compressor.
Step 6: Add hotspots for details that are not parts
Some things worth explaining aren't separate parts: a logo, a handle, a vent, a seam. For those, click Hotspots in the toolbar, then Add a hotspot, and click the point on the model where it goes.
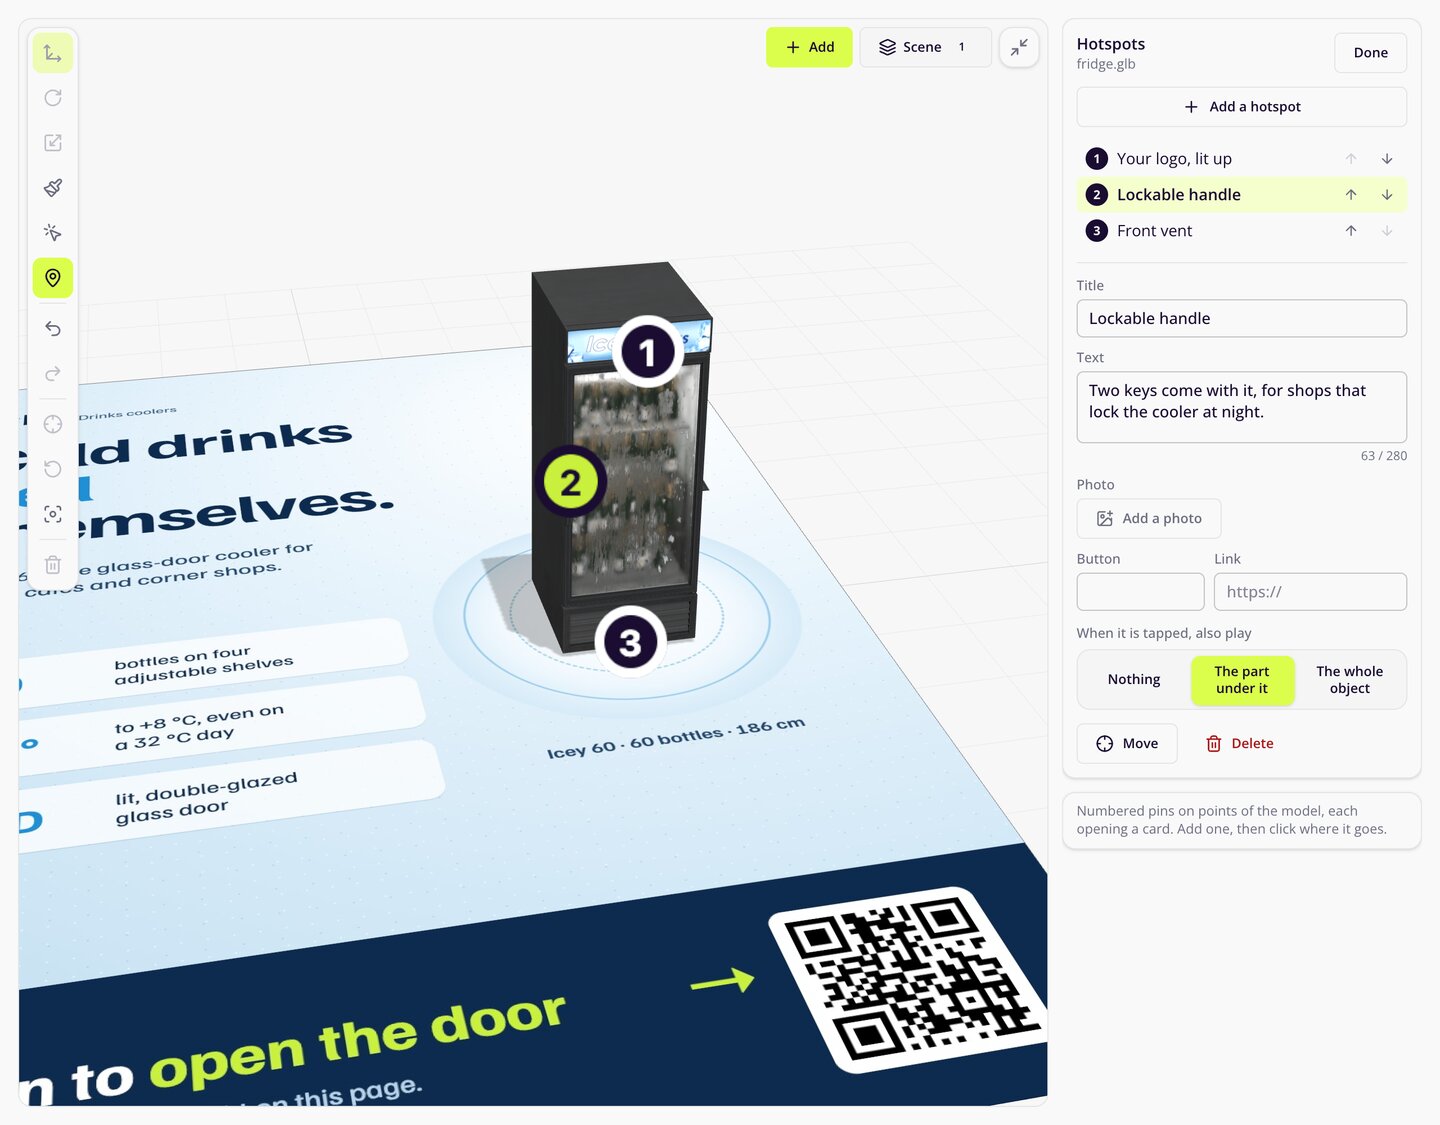
Each hotspot is a numbered pin with the same kind of card as a part. A few things to know:
- Visitors see the numbers in order, so use Earlier in the tour and Later in the tour to tell the story in the right order.
- When it is tapped, also play can move The part under it or The whole object. A pin on the door handle can open the door.
- Each object can have up to 20 hotspots. Three to five usually say more than twenty.
Step 7: Publish, test and see what people tap
Add a short line of text and up to three links if you like, then click Publish experience. When it is ready, download the print image and print one copy at real size before you print the whole run. Scan it on two different phones.
This is what people get:
- A short hint, Tap the parts to explore, the first time the model appears.
- A glowing dot on every part with a card, and the numbered hotspots. A dot turns lime once its card has been read.
- Cards slide up from the bottom of the screen, with Play again and Next to walk through them. A swipe down or a tap outside closes them.
Every tap is counted. On the experience's edit page, Taps on 3D parts shows the most tapped parts and hotspots, with the cards opened and the links followed. For business cards you find it in the card's Performance tab. You'll see which features people care about, and which button they actually click.
And because the cards and moves are only settings, you can change them after printing. Play modes, tap actions, hotspots, text and links are free to edit and show on the next scan. Moving or replacing the 3D objects uses one experience when you publish the change. The printed page and its QR code stay as they are.
Ideas that work
- Sell sheets and catalogues. Each component with its spec, and a "Get a quote" button on the part people ask about most.
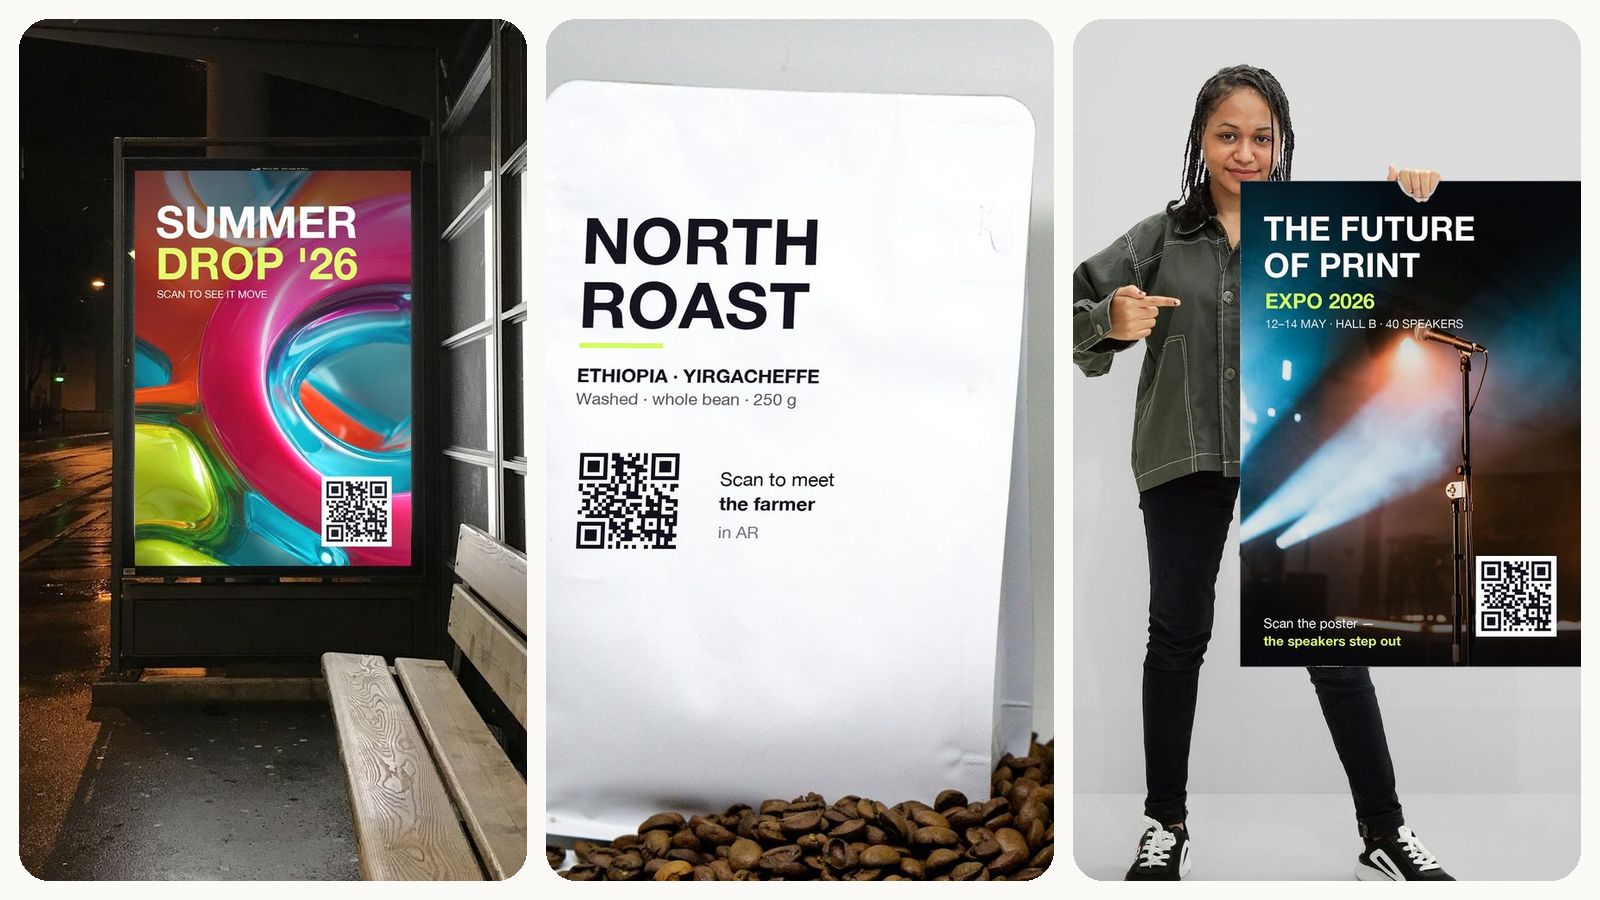
- Packaging. The lid opens in 3D and every item inside has a card: what it is, how to use it, where to reorder.
- Trade shows. The machine you couldn't bring, standing on a flyer, with a "Book a demo" button.
- Robots and machines. An arm that picks and places on the brochure, animated in the timeline.
- Museums and schools. An exhibit with numbered hotspots that work as a guided tour.
- Business cards. Your product on your card, ready to explain itself after the meeting.
Mistakes to avoid
- One merged mesh. Nothing to tap. Keep the parts separate when you export.
- Unnamed parts. "Part 7" means nothing to a visitor. Name parts in your 3D tool, or in the Name field.
- A model that is too heavy. If it takes long to load on mobile data, people leave before it appears.
- Several animations for the same parts. Only the first one plays, so merge them into one.
- A card for every screw. Pick the three to five things people would ask a salesperson.
- No test print. Check the model's size and the taps on a real print, on a real phone, before the full run.
Frequently asked questions
Do people need an app to see a 3D model on print?
No. They scan the QR code with their phone camera and the 3D model opens in the browser, standing on the printed page. It works in Safari on iPhone and in Chrome on Android.
Which 3D file formats can I use?
GLB or glTF works best, with animations and textures included, up to 50 MB. Meishi also builds a model in your browser from a robot (a URDF with STL, DAE or OBJ parts) or from several loose STL, OBJ or DAE files, one part per file.
Can I animate a 3D model without Blender?
Yes. In Tap actions, any part can lift, spin, bounce or pop out when it is tapped, even on a model without animation. Robots imported from a URDF also get a keyframe timeline in the editor.
How do I make parts of a 3D model clickable?
Export the model with separate, named parts. In the Meishi editor, open Tap actions, pick a part, and give it a move and an info card with a title, text, photo and button. For points that are not separate parts, add numbered hotspots.
How many hotspots can a model have?
Up to 20 per object. They are numbered in the order you set, so visitors can follow them like a tour.
Can I change the descriptions after printing?
Yes. Play modes, tap actions, hotspots, text and links are free to change and show on the next scan. Moving or replacing the 3D objects uses one experience. The printed page and QR code stay the same.
Can I see which parts people tap?
Yes. Taps on 3D parts shows the taps, cards opened and links followed for every part and hotspot, on the experience page and in a business card's Performance tab.